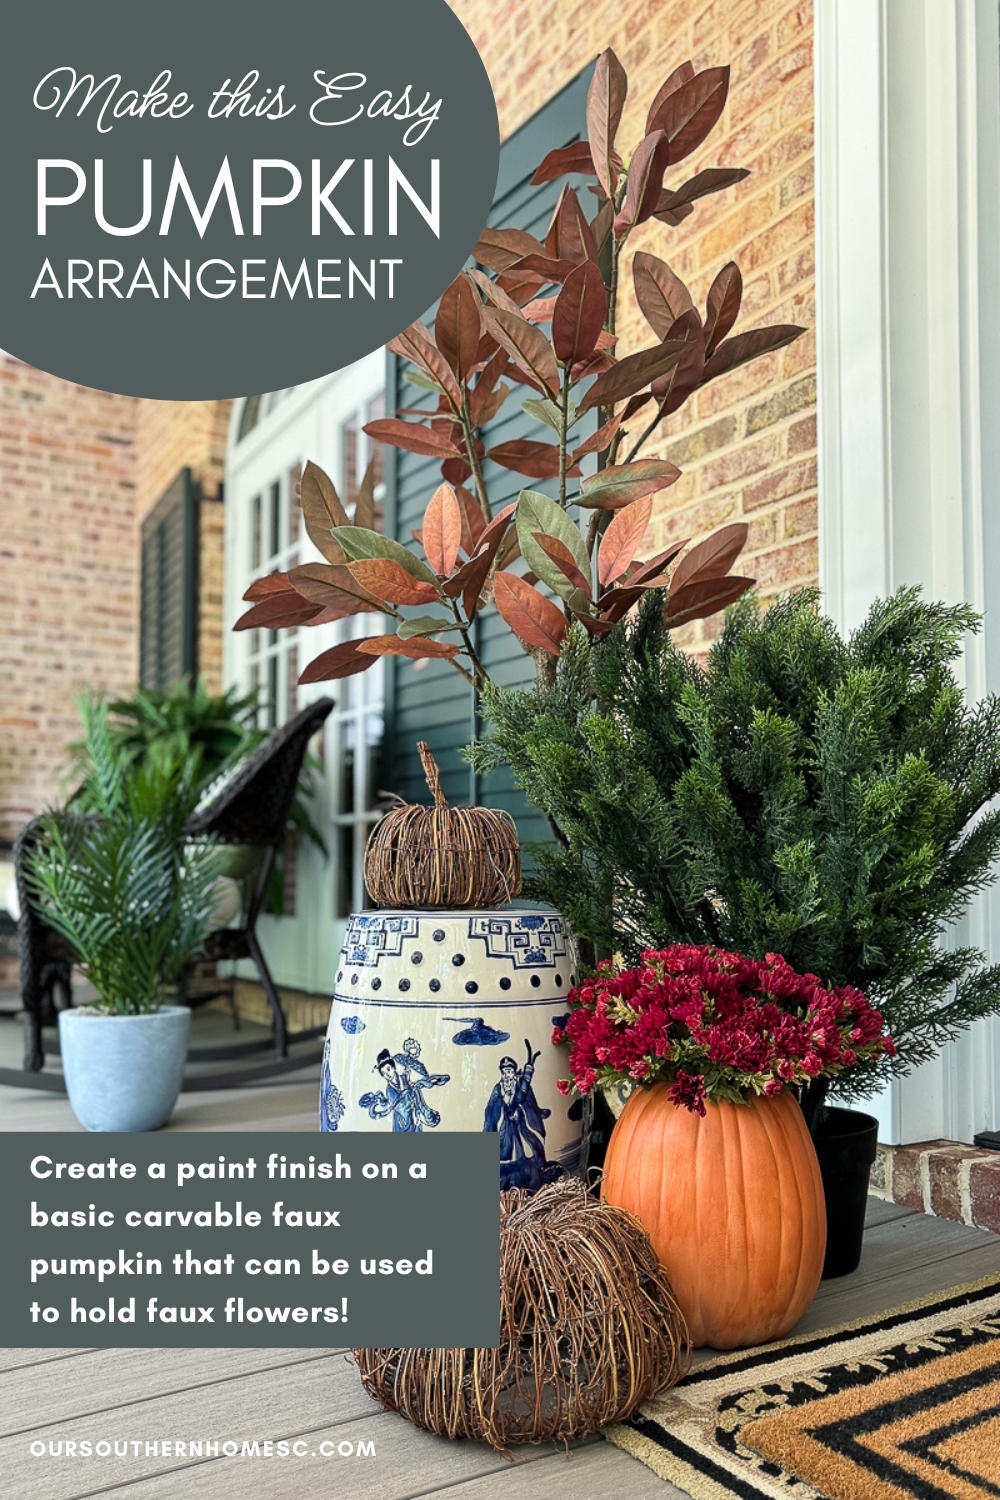
How to Make an Easy DIY Faux Pumpkin Arrangement
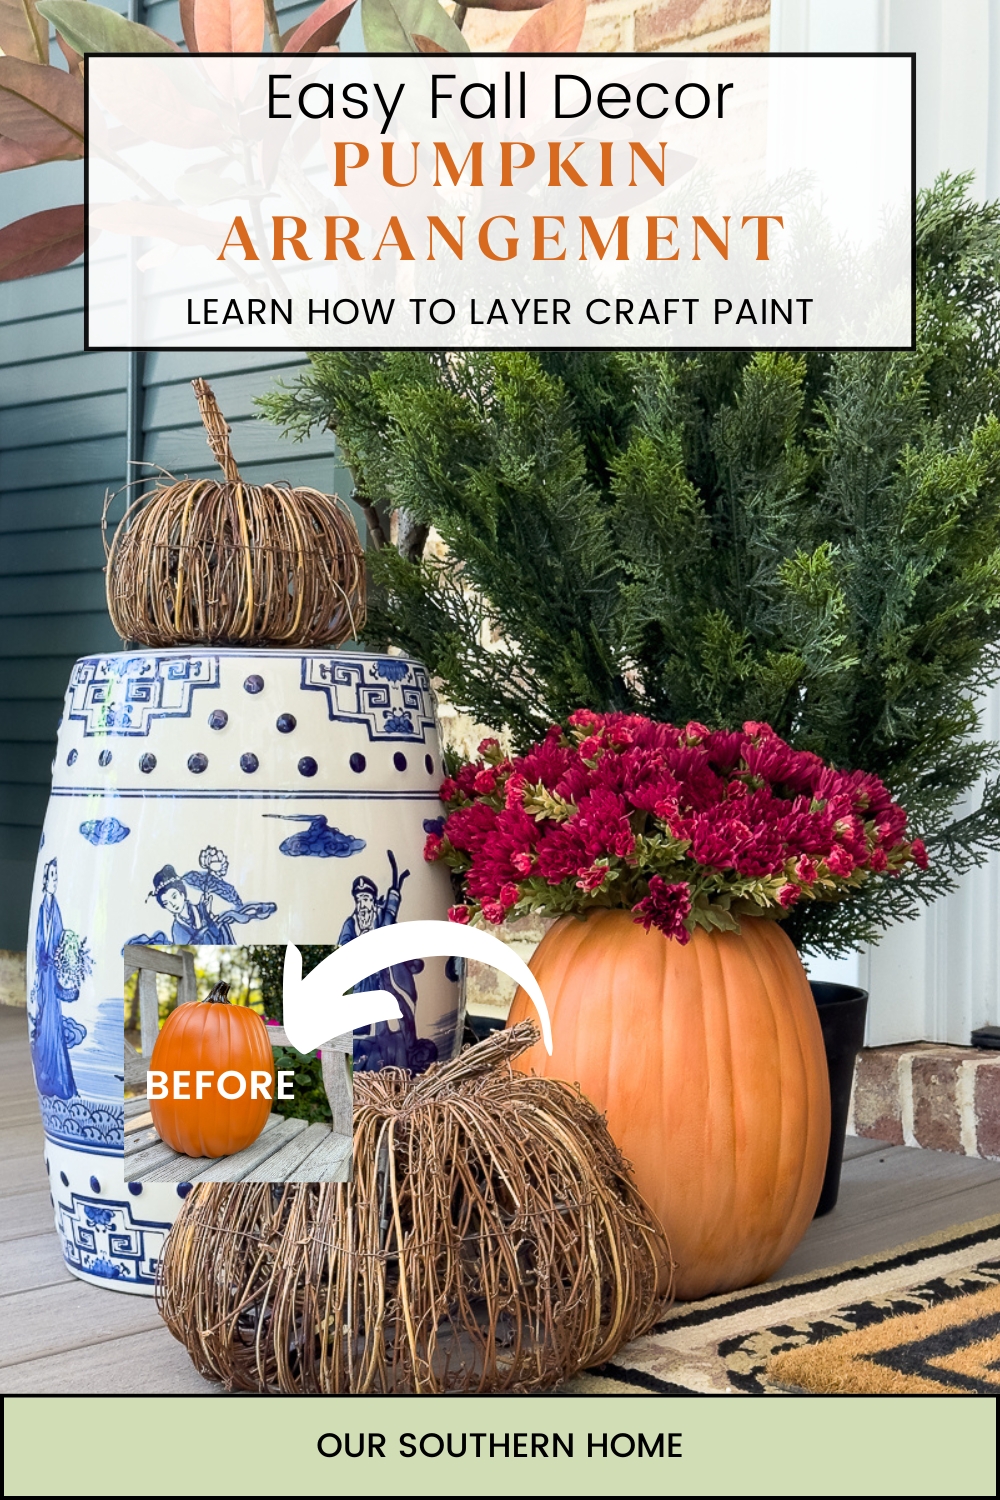
Learn how to make an easy DIY faux pumpkin arrangement with craft paint and artificial mums to decorate a fall home.
Latest from OSH
- Create a Cozy Fall Home with the 5 Senses: Part 1
- How to Use Rub ‘n Buff to Update a Thrift Store Lamp
- Saturdays on the Porch #72
- Over 45 Faux Pumpkin Craft Ideas
- How to Make an Easy DIY Faux Pumpkin Arrangement
This post may contain affiliate links. If you purchase something using one of my links, I may earn a small commission from the retailer costing you nothing more. You can read more on my disclosure page. Christy Little of Our Southern Home is a participant in the Amazon Services LLC Associates Program, an affiliate advertising program designed to provide a means for sites to earn advertising fees by advertising and linking to amazon.com.

Be sure to visit our fabulous host, Cindy, from County Road 407. She organizes our monthly Pinterest Challenges!
Be sure to check out my fall inspiration HERE at Our Southern Home.
What is the Pinterest Challenge?
Each month, we are given a topic or a photo for inspiration. Think about looking through Pinterest for inspiration. That is how Cindy gets inspired by the challenge. If it is photo inspiration, she visits the source and asks if they'd like to be our inspiration for the monthly challenge. It's that simple! It's such a fun post each month.
This month we are creating pumpkin crafts! There is no specific project. This is so fun. I know you will be inspired by all of the fresh ideas that you will find at the bottom of this post.
If you are visiting from Bluesky at Home, welcome! Carol has a gorgeous home. You are going to adore this creative DIY napkin ring idea for fall.


Unless you see them side by side, it might be hard to see the difference between the before and after.
The new pumpkin truly looks fake with no personality. As is, it does not work well with my decorating aesthetic. I've got an easy fix for that. Let's get started creating that decorative paint finish.
This project is fast and easy. It is perfect for the beginning crafter. It takes longer to cut out the top with a kitchen knife than it does to create a decorative paint finish.
How to Make an Easy DIY Faux Pumpkin Arrangement
I have not brought my fall decor out of the attic yet, so I grabbed a new pumpkin while running errands. You could easily use one you already own or find one at the thrift store.
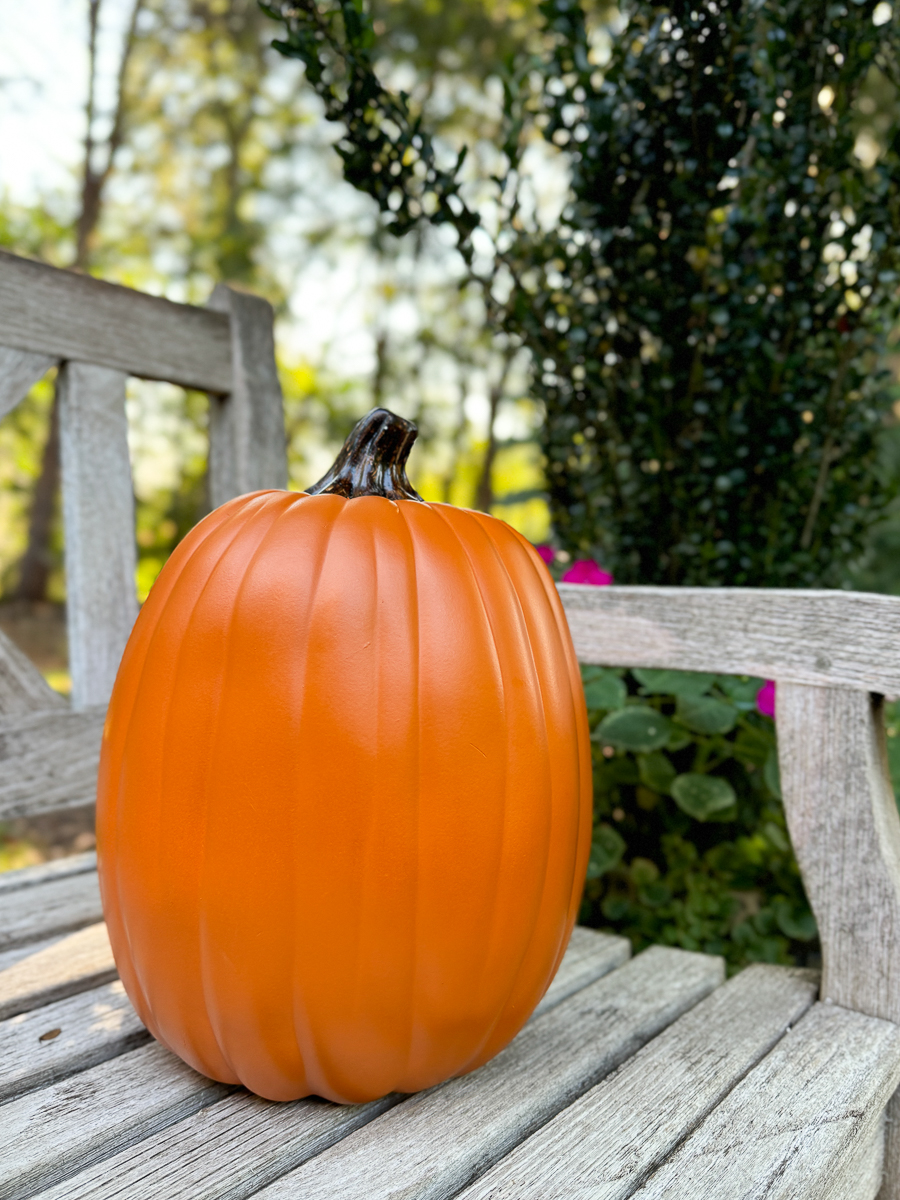
The pumpkin you select is very important. You want to buy one that is carvable or hollow on the inside. You need a place to arrange your flowers.
Gather the Supplies
- Carvable Faux Pumpkin: Here are a couple ONE | TWO
- kitchen knife
- Optional Terra cotta Spray Paint
- Craft Paint: Orange 1 | Orange 2 | White
- Spray sealer
- handy spray nozzle
- floral foam
- faux mums: ONE | TWO | THREE
- Brushes | Sponges | Stencil Brush
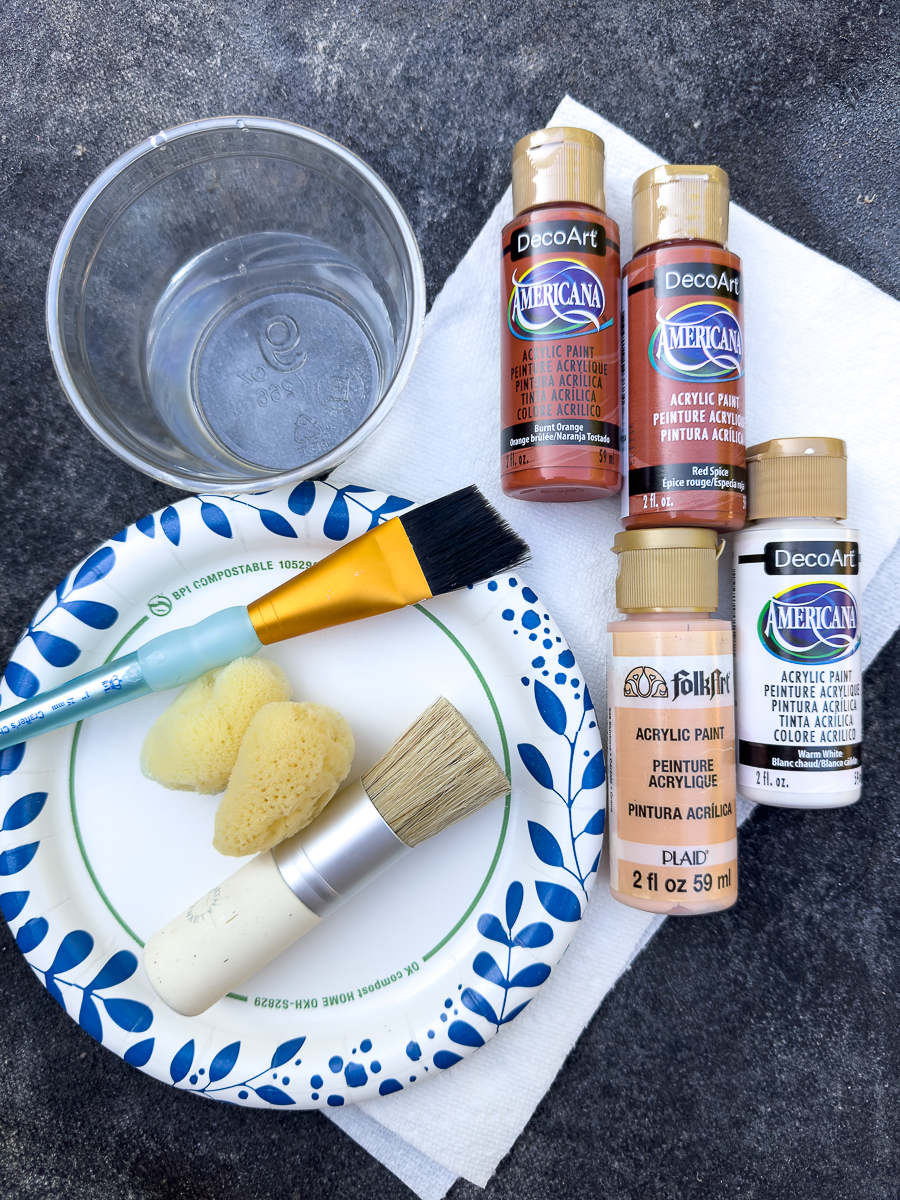
These are the supplies that I had on hand. I sourced similar colors in the supply list. I didn't use the peach because it was old and dried up. Peach is very easy to make by adding a bit of white a dark orange.
Instructions for the Arrangement
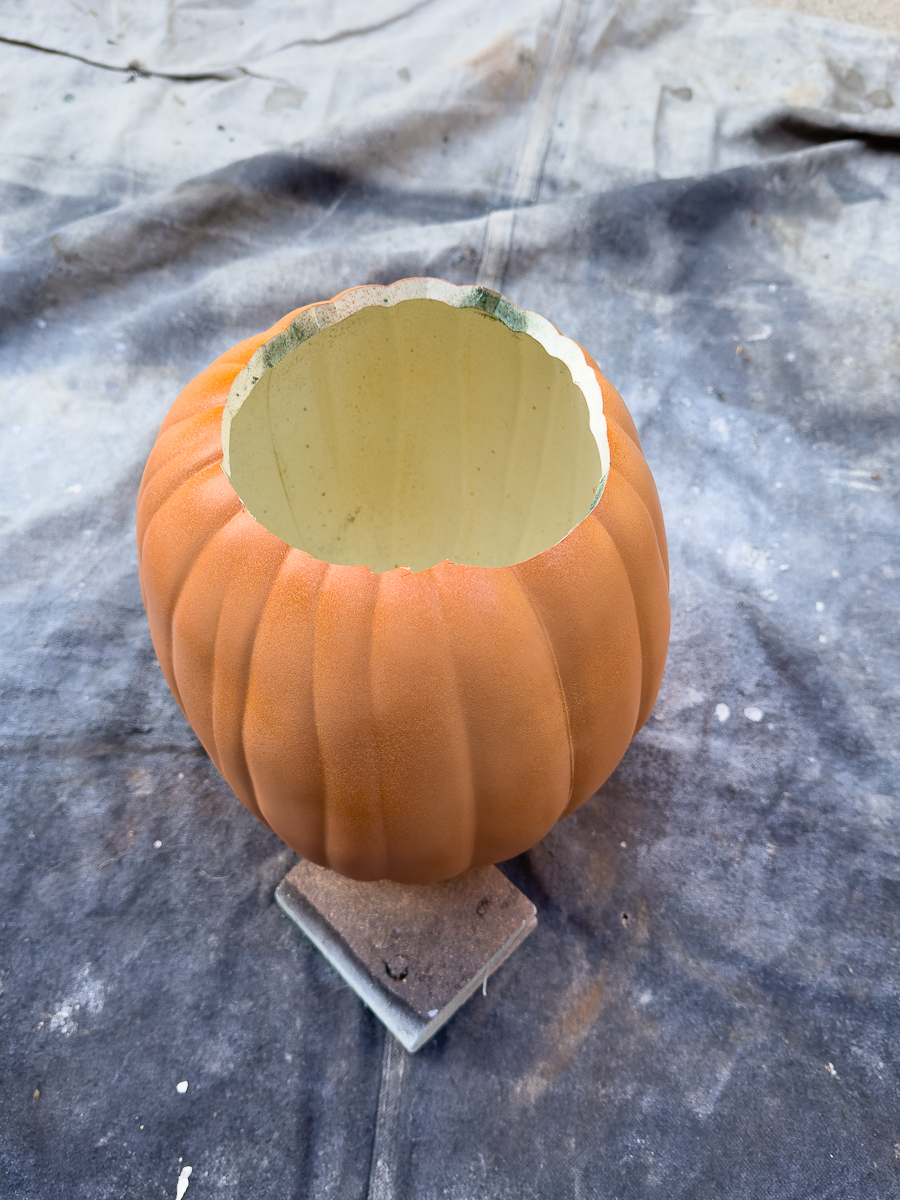
Before I started any painting, I cut the top out for the floral arrangement using a kitchen knife.

I removed these faux mums from a basket to use with this project. I cut the opening to fit the floral foam.
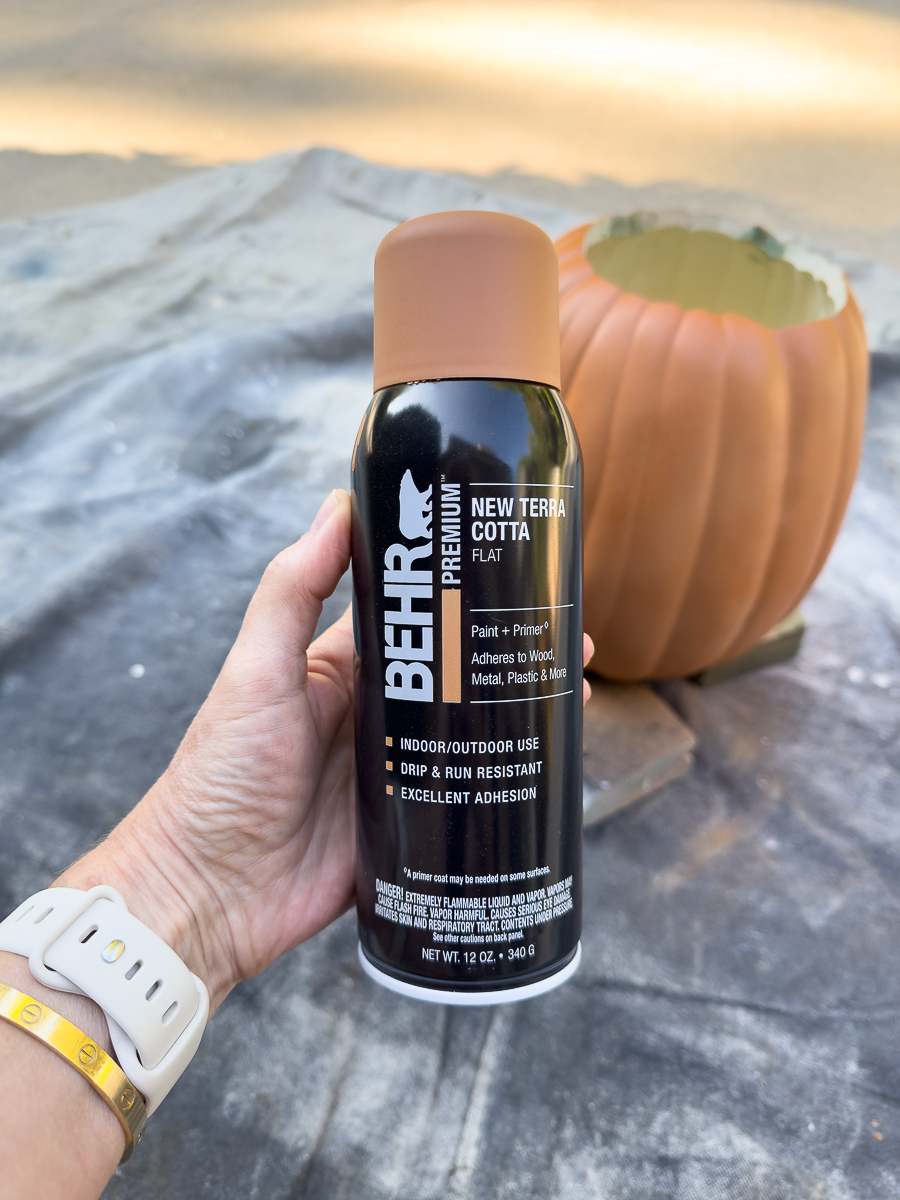
I used this spray paint last fall and had a tiny amount left. It is a gorgeous terra cotta color.
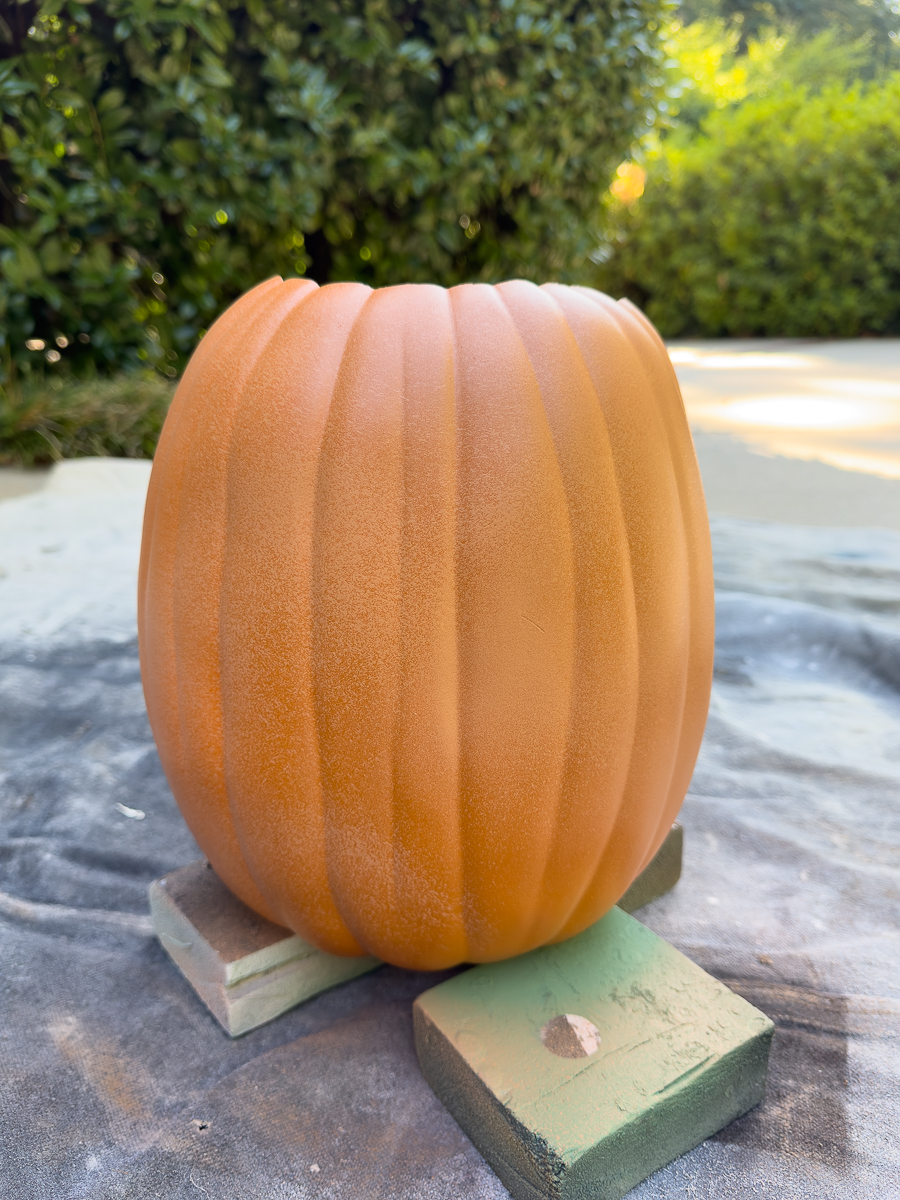
I used what I had left to erratically spray on the pumpkin. You can see what a beautiful color it is. You do not need this spray paint. You can go straight to the craft paints without this. I just wanted to use it up.


There is honestly no rhyme or reason for the painting. Create different colors by blending the oranges with a bit of white. Use your different brushes to get different patterns.


Just blend and play. I did try to go in one direction (down) when painting so it would mimic heirloom pumpkins. For the most part, I used a light hand. I prefer to swipe a freshly loaded paintbrush on a paper towel. This allows a slight dry brush over the pumpkin allowing other colors to come through.
Let it dry completely!
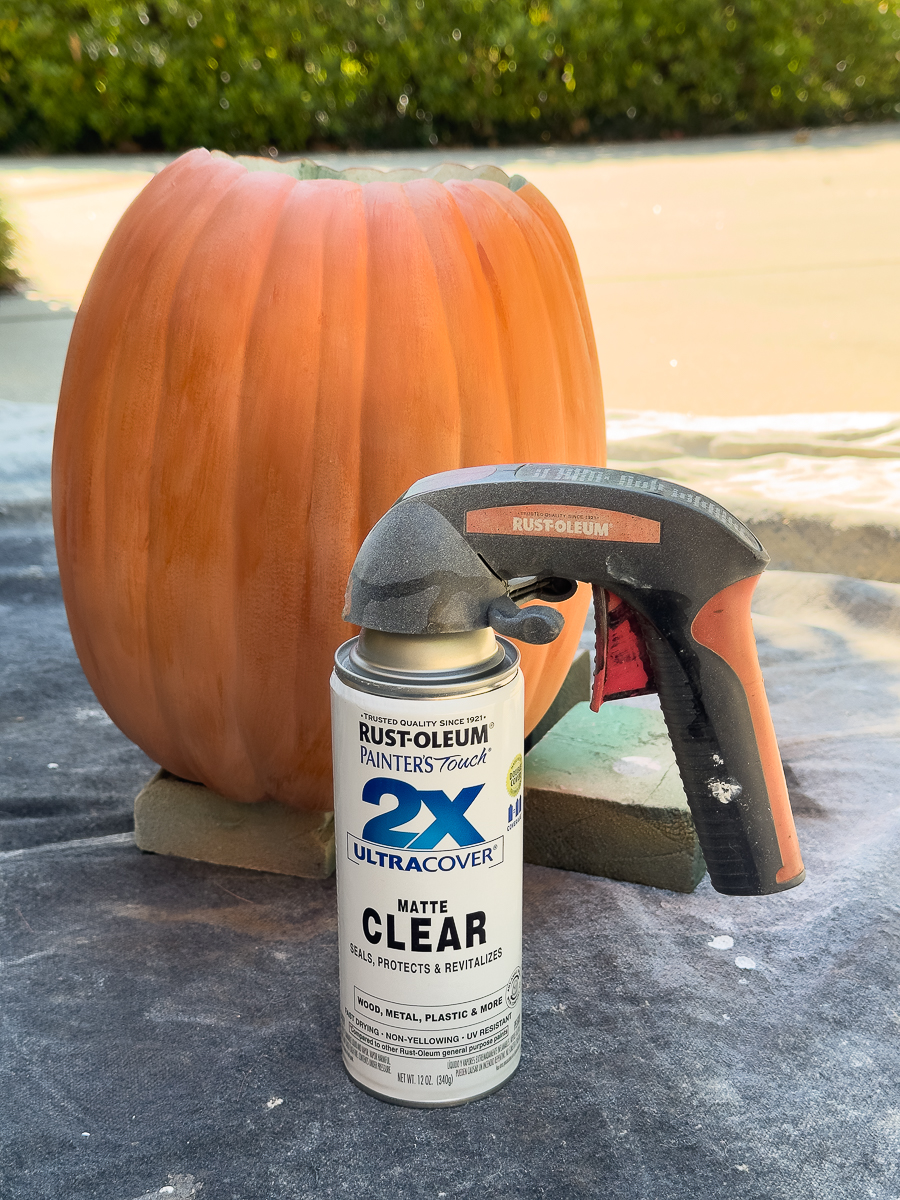
Apply 2-3 coats of clear matte spray sealer. Be sure to turn the pumpkin upside down to get all angles. This dries quickly.
Insert flowers to arrange!
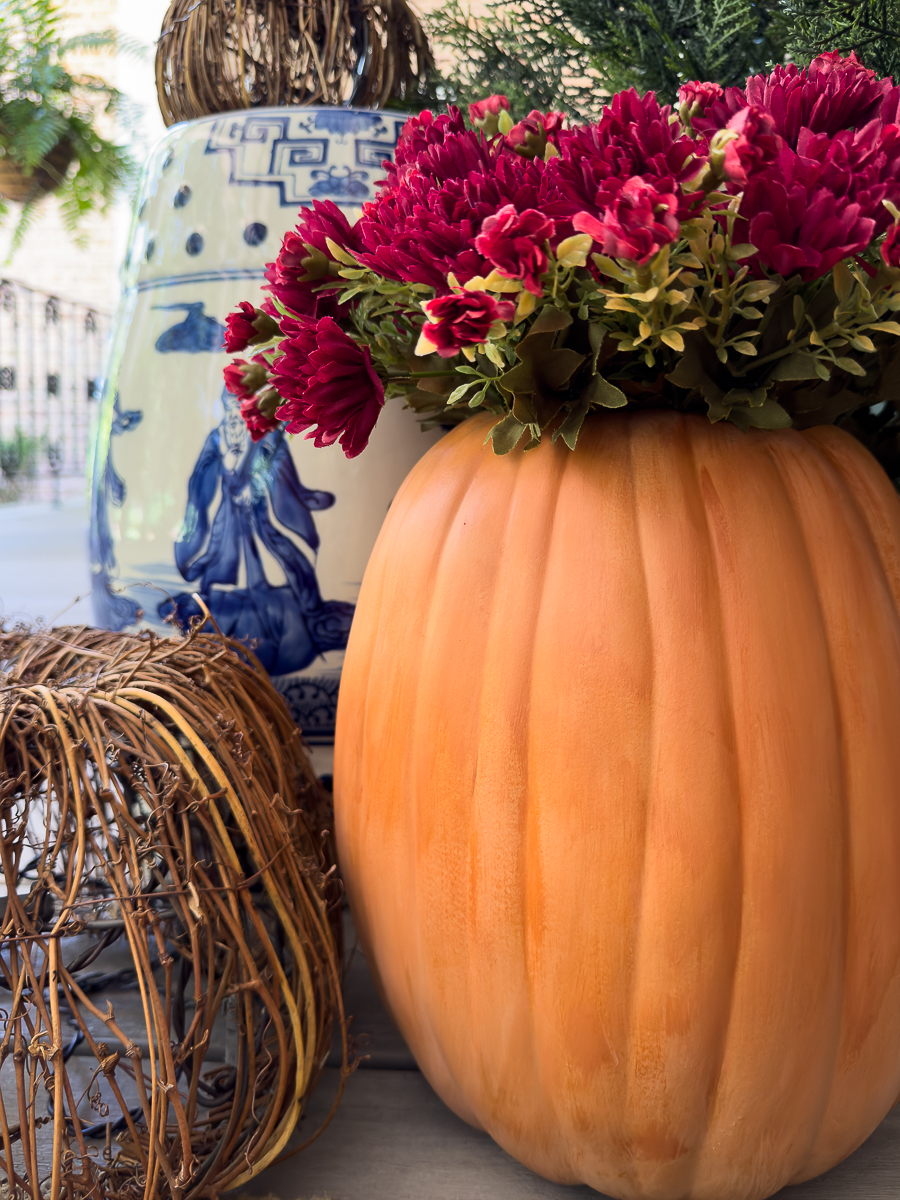
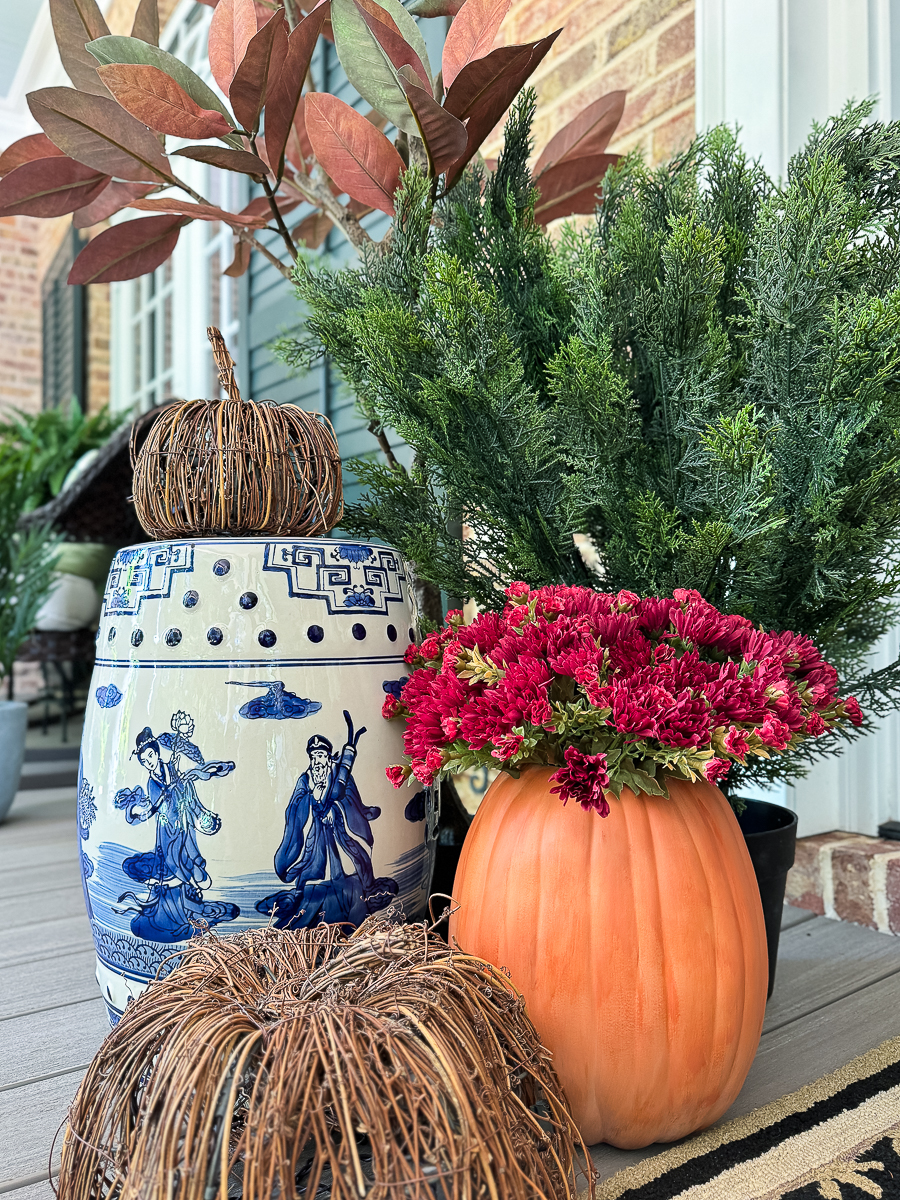
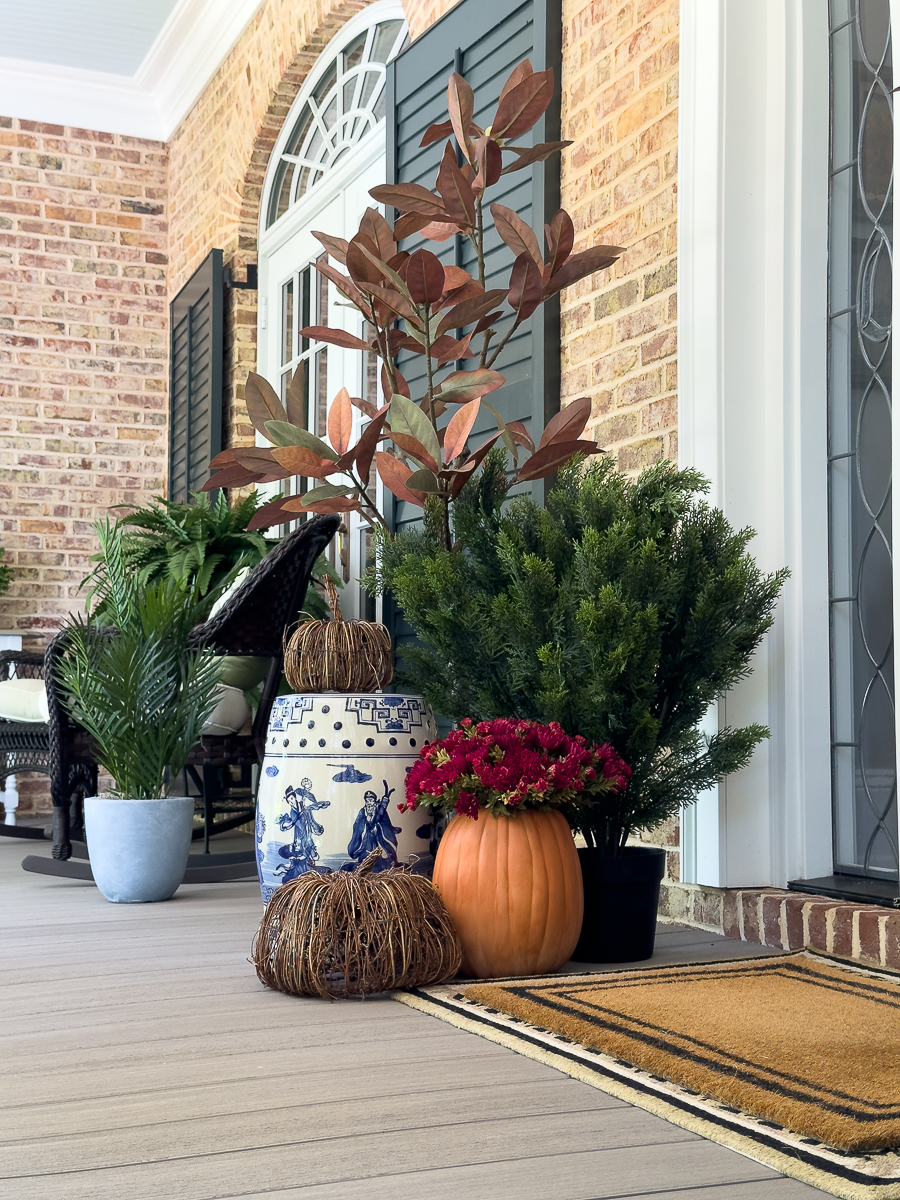
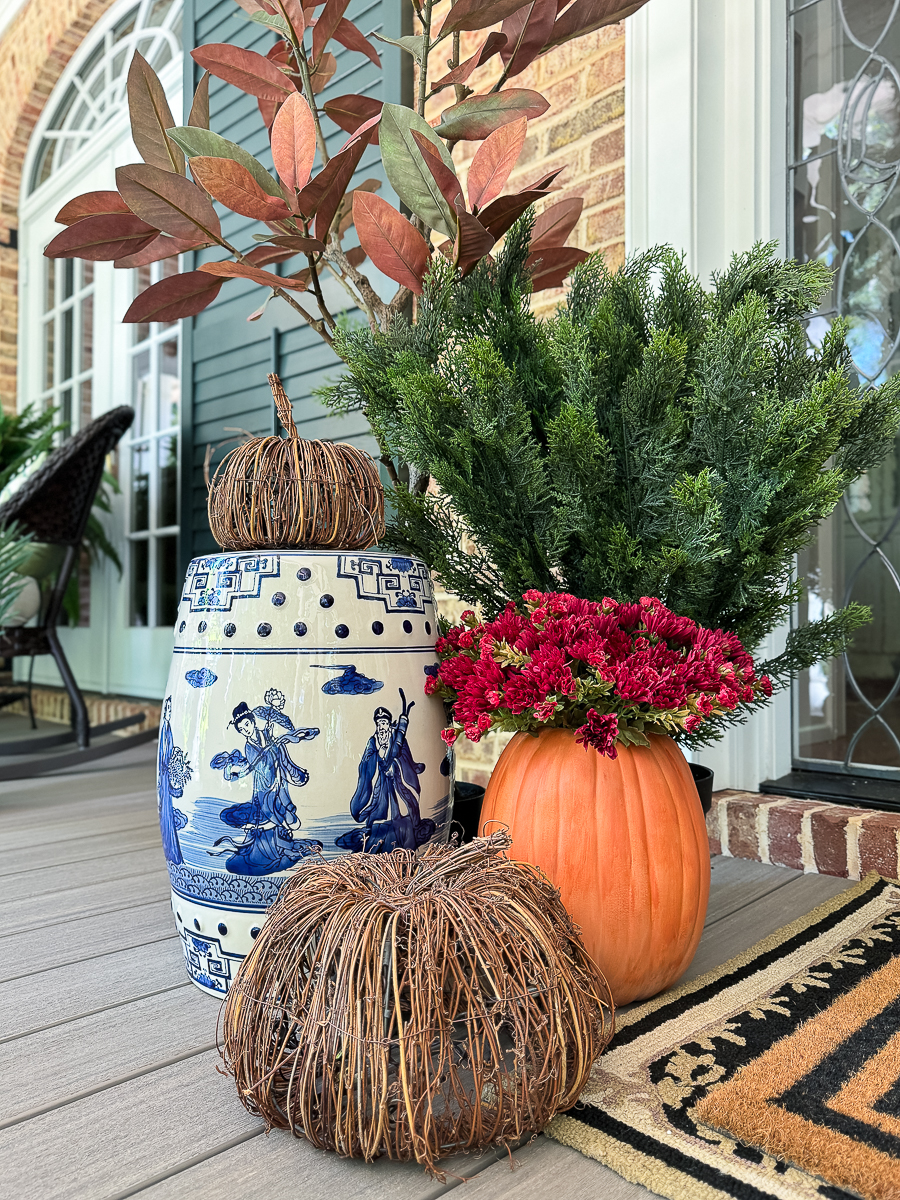
Styling the Painted Pumpkin Arrangement
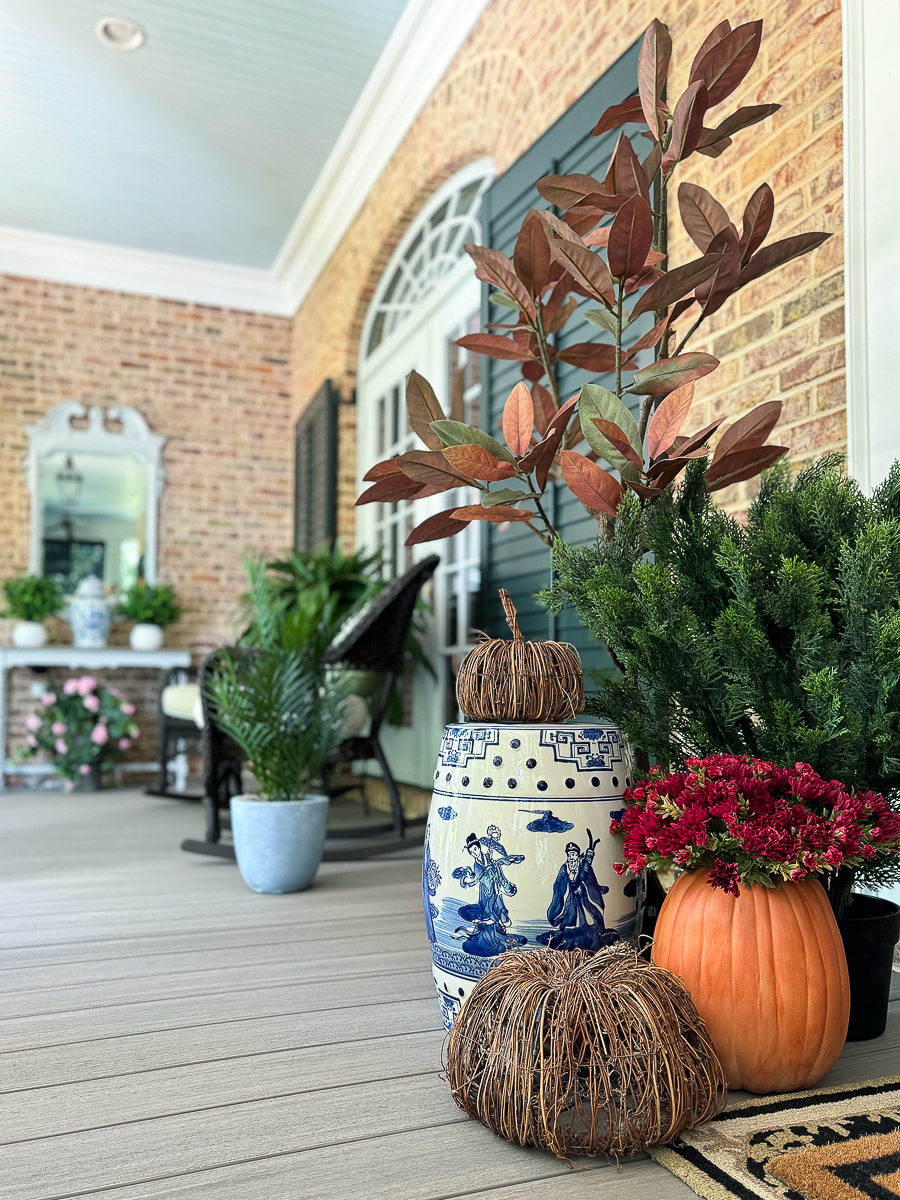
Garden Stool | Grapevine Pumpkins | Faux Cedar Bush | Faux Magnolia Tree
This is just a little quick vignette to see how the faux pumpkin looks styled. In the coming days, I'll be getting the entire porch ready for the season. Just pretend the summer flowers aren't in the background.
I am so pleased with how this simple pumpkin project turned out. I'm anxious to make a couple more to go around the door area.
The decorative paint finish makes it look much more realistic. It's a much softer look.
Here in the South, we get some hot days even up until Halloween. Real pumpkins just don't do well in the heat. A rotting pumpkin on the porch is not a fun thing.
I do miss the days of kids at home and carving real ones a few days leading up to Halloween.
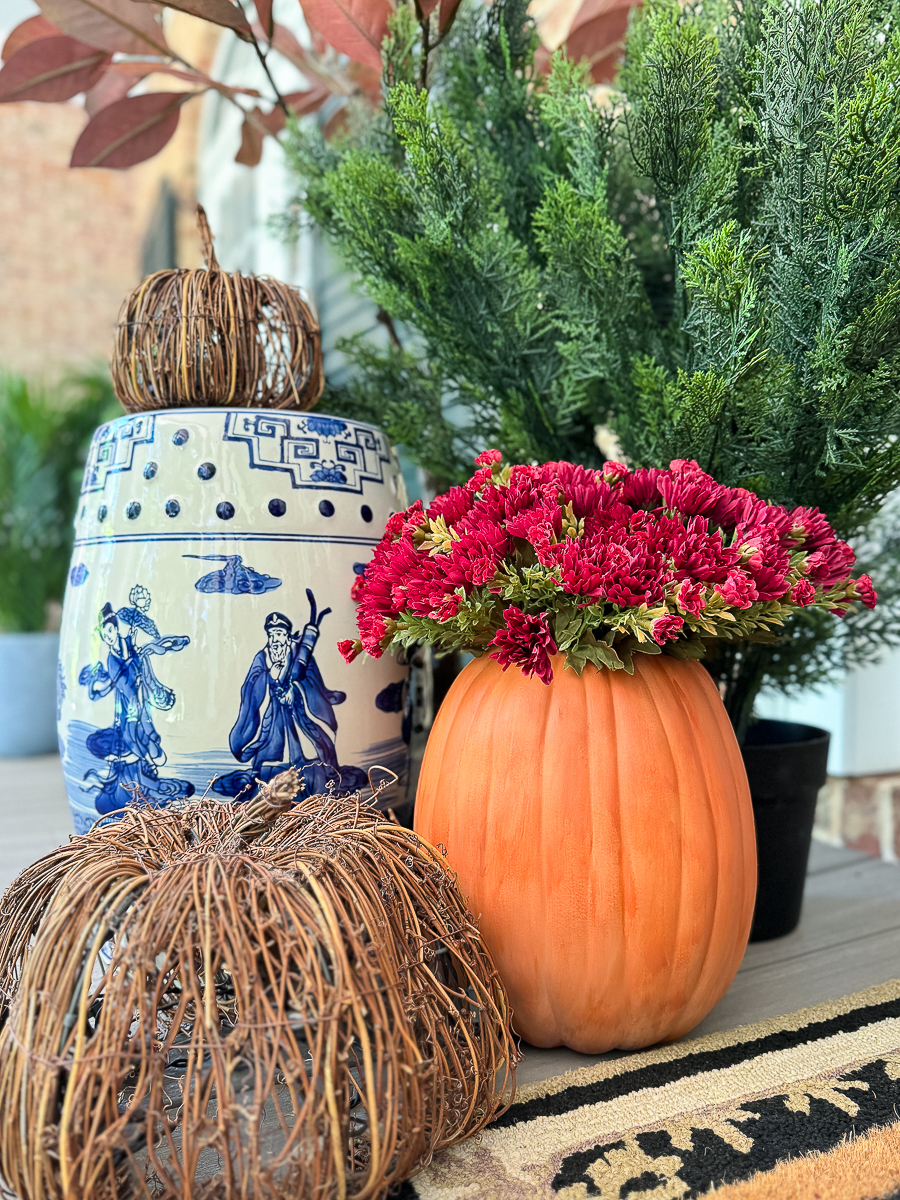
The subtle variations in colors are the trick to a lifelike look.
Have you ever tried painting pumpkins? It's a great way to give them a fresh new look. Here are a few more painted pumpkin projects on the blog.
Up next on today's hop is a lovely pressed flower pumpkin from My Family Thyme.
Check out more ideas from this month's challenge!


Christy has been creating content for Our Southern Home since 2012. She has been featured in numerous print and online publications. Her classic, eclectic design approach spans her home and fashion style. Christy has a way of mixing store-bought with thrift store, antique and vintage finds. As a recent empty nester, she is having fun navigating this new stage of life. Read more about Christy HERE. Be sure to subscribe below. You can also contact me HERE.


Christy, I love how you used paint to elevate a plain craft pumpkin into a beautiful heirloom pumpkin. It’s beautiful! I can’t wait to give this project a try! Happy Early Fall!
Thanks so much, Lynne! It was a fun project!
Christy, your painted pumpkin is so much prettier than the basic bright orange. And the mums look perfect in there. Your porch is beautiful! Happy early fall, y’all!
Thanks so much, Angie! I look forward to using it year after year!
Love your pretty arrangement. It looks so inviting on your porch. Great idea to have a great vase for some pretty flowers too.
Great way to upscale one of those standard fake pumpkins from the craft store. The flowers look great on your porch.
Christy, wow! Your faux pumpkin really does look real!! It’s amazing what a subtle paint job can do. I love the whole setup on the porch ~ looks amazing for early fall!!
Enjoy your fall!
Cristy
I love your pumpkin arrangement! It looks so lovely with your grouping.
Thanks so very much, Rachel!
Wowza what a difference a little paint can make! Your pumpkin looks soooooo much better and is the perfect color for your flowers. It’s going to look pretty all season long. Your porch always looks fabulous. Thank you so much for joining in.
Christy, this little fall grouping on your porch is so pretty, and I love how your pumpkin arrangement turn out. What a transformation with just a little bit of paint! Pinning!
So gorgeous Christy, the mums look amazing! It’s nice to see there’s a good terracotta spray paint on the market! Your porch is beautiful! Pinned.
Thanks bunches, Cindy! Yes, that spray is a gorgeous fall color.
This pumpkin arrangement is amazing, Christy! I love the way you added all the different layers of paint to give this carvable pumpkin a bit of patina, it’s really beautiful. The color mums you chose too are fabulous too. I’ve been seeing that burgundy/wine color everywhere this season and it makes me want to cozy up! Sending you hugs and hoping your Fall is filled with extra special blessings, CoCo